Bleaching Hair 101: How to Take Care of Bleached Hair and Other Questions Answered
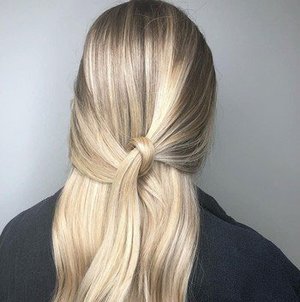
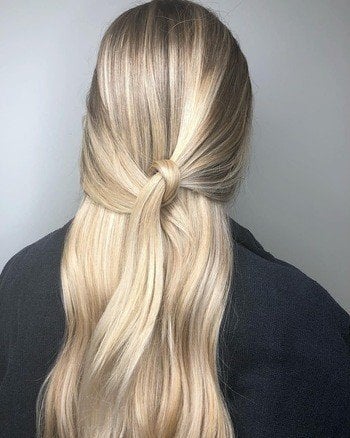
Whether you’re a natural blonde looking to go blonder or a brunette wanting to cross over to the bright side, some lightening will need to be involved in the dye process. While the results of going lighter are always exciting, hair bleach can take a major toll on your tresses. The good news? Doing it the right way supports hair strength alongside your new tone.
Learn how to prepare hair for bleaching and correctly go about lightening your hair (spoiler alert, see a professional) so that you can attain the colour of your dreams without sacrificing the integrity of your hair.
WHAT HAPPENS TO HAIR WHEN YOU BLEACH IT?
Lightening your hair colour is actually quite a complex chemical process that takes a high level of skill. There are 2 main phases:
Part 1: An alkaline ingredient in the colour (often ammonia), opens up the cuticle, the outermost layer of the hair strand. This allows for the hair lightener to get into the hair.
Part 2: “A hair lightener breaks apart the pigment in your hair so that light is reflected through it and the colour looks blond. The pigment is still there, it’s just broken up so much that you can’t see it,” explains Redken Artist Celene Dupuis.
The thing about this chemical process is that every time a hair lightener or hair bleach breaks down these pigments, it also breaks up 15 to 20% of the disulphide protein bonds in your hair, which can present as intense damage. Given what happens to hair when you bleach it, knowing how to care for bleached hair by combatting this protein loss with the help of a professional is invaluable.
HOW TO TAKE CARE OF BLEACHED HAIR: PRE-LIGHTENING PREPARATION
To give hair the best chance at staying healthy, here are our tips to prepare hair for bleaching and beyond:Put down the straightener
Leave heat styling tools alone for at least a week before dyeing (or more, depending on the current condition of your hair) in order to minimise drying out hair and damaging further.Oil is your friend
Your head produces oils (sebum) naturally for good reason. These essential oils form a protective barrier to moisturise hair and skin, and promote healthy follicles. The skin of the scalp can be sensitive, so make sure you haven't washed your hair at least 2-3 days prior to your lightening service.Ensure hair is well moisturised
As the cuticle is opened during a lightening service, it makes sense that this leaves hair at risk of moisture loss. Combat this with a deep conditioning hair mask or professional hair treatment in the weeks leading up to bleaching. For very damaged and overprocessed hair, your salon professional may recommend the Acidic Bonding Concentrate system for intense repair.Set realistic expectations
It's great to have inspiration (especially in the form of pictures) when you chat to a salon stylist about your lightened hair goals. During this consultation, be upfront and honest about all previous services you've had (including lightening, colouring, perms and chemical straightening) so that they can accurately assess what is achievable for your hair, whether multiple visits are required and the after care for bleached hair that is required.
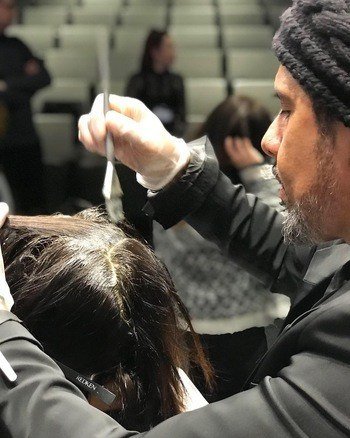
ALWAYS SEE A PROFESSIONAL HAIR COLOURIST TO LIGHTEN YOUR HAIR
Repeat after us: I will not bleach my own hair. This is definitely not the time to consider DIY, as what happens to hair when you bleach it needs to be professionally managed to prevent major damage and achieve the intended tone.
“It requires lots of care and skill to make sure that the hair lightener is being applied correctly and in a timely fashion so that you don’t end up with excess breakage,” explains Celene. Not only will a professional colourist know how to do this, they can also help you come up with a progressive lightening plan. If you’re making a drastic change, it’s also recommended to gradually lighten your hair in phases.
“This keeps the hair healthier, so you can ultimately push the colour further and get a better end result,” Celene says. Depending on how light you want to go, this can mean spacing your colouring appointments at least six weeks apart, if not more.
THE RIGHT PRODUCTS CAN MAKE ALL THE DIFFERENCE
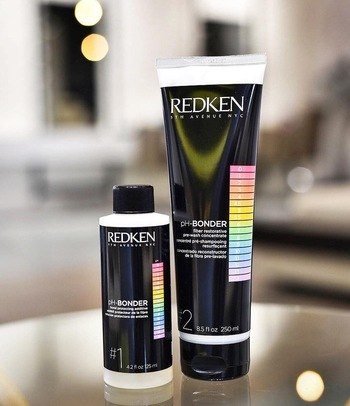
High quality products in the dyeing and aftercare process are an essential part of bleaching 101. Another benefit of seeing an expert is getting access to professional products. “Colourists can add Redken PH-Bonder directly into the hair lightener, which will help protect those protein bonds from damage,” says Dupuis. “It can make the difference between it taking six sessions to get the colour you want, versus three.” Redken's range of professional hair lighteners can be customised by your stylist, with some innovative products Flash Lift Bonder Inside to repair simultaneously.
HOW TO CARE FOR BLEACHED HAIR
Not only is the choice of lightener crucial, the right after care for bleached hair is just as important. Celene recommends the Redken Extreme Cat Protein Reconstructing Hair Treatment Spray. Whenever you use hair bleach, a chemical called cystic acid is produced, which is what breaks down the hair; this spray-on, leave-in treatment neutralizes that damaging acid. As if that weren’t enough, it also evens out the porosity of the hair, so you end up with a more even colour and tone, she adds. Her stylist secret: start using it even before you colour your hair after every third shampoo for the month prior to your appointment. Then, use it every second shampoo post-colouring.
For more tips on how to care for bleached hair, take a look at our hair colour blog articles including how to brighten blonde hair and how to keep your colour treated hair healthy and beautiful between salon visits, all with the help of the Color Extend range of products.
Find a local Redken Hair Colourist today to plan your personalized lightening service.